![]()
|
Volume 3, Issue 3, January, 2006
|
|
"LOW
DOWN LEO by Stacy Hobbs | |
|
Editor’s
Note: For this month’s column, Stacy has included his hand-written
tablature for the music and included a recording of it for you to see and
hear exactly what he is describing. The column then consists of Stacy’s
extremely detailed explanation of the fingering and techniques he uses and
the “chord shapes” he visualizes. We recommend starting with the Music and Tab, then read Stacy’s notes
for further details as needed. Hello again!
We’ll keep moving right along from the last two columns into a
tune I call Low Down Leo! We‘ll be in
“Dropped-D” tuning on the regular 6-string neck. And the sub-basses
tuned to GABCDG, nothing new here… First let’s play
the 5th and 4th strings of a “C “chord at the 5th and 4th frets,
respectively. Fret the notes with you left hand middle and index fingers. You essentially have
the bottom part of a “D” chord. We are fretting a partial C shape up
to frets to sound as D. Our right hand
pattern will be the same throughout most of the tune so Ill explain more
on the left hand fingering as we progress. First though, what
is the right hand pattern? Pinch the ring and
thumb on the first beat of 1, 2, and 3, followed by index then middle
(pinch, 2, 3); repeat this four times in a measure! Meaning, we’ll be
playing four sets of 3 on this tune for the most part.
Technically it’s
12/8 time and has the feel of a jig! Counted out,
it’s….123,123,123,123 Here’s the tune! Start by pinching
the 8th and 4th string with your right hand thumb and ring. Follow this by
playing first the 5th, and then the 6th string with your right hand middle
and index, respectively. (You should still be holding down that D chord C
shape fretted at beginning) Play this pattern 4
times. So it sounds: Pinch 2, 3, Pinch,
2, 3 Next we move the
left hand forward on the same 2 strings, now fretting the 7th fret, 5th
string and 5th fret, 4th string. I
typically just slide the shape up one fret and add the ring finger in
front of the middle to fret the 7th fret.
We’ll refer to
this as the “spread” shape, as opposed to the “closed shape” of
our “C” positioned “D” chord. Spread shapes have
an open fret in between, closed shapes do not! Still holding the
above shape, repeat the 123,123,123,123 pattern. Slide this shape up
2 more frets so you’re now on the 9th fret, 5th string and 7th fret, 4th
string. Again,
123,123,123,123. Remember, we’re
always pinching on the 1st beat of each set of three. Next we keep moving
our left hand forward while changing back to playing the original “C”
closed shape. We should now be on
the 10th fret 5th string and 9th fret 4th string. C shape, G sound...refer
to CAGED workshop if things are getting out of control! Make sure you’re
fingering the chords with your left hand middle and index in order to set
you up for the next section. Your sub-bass note
also changes to accommodate that last chord change; to the “G”.
It’s the 7th string for me but could be a different one for you! Once again, play
123,123,123,123 to end out this section. For our next
adventure, we keep thinking 123,123,123,123. Only now, each of
these 123 counts will have a different shape, which corresponds to it.
You will still be pinching on the 1st count/beat of each set of
123. The first of the 4
sets will be the G chord above, or C shape 10th fret... The 2nd set (group)
you’ll move forward to fret the 12th fret 5th string and 10th fret 4th
string (spread shape). 3rd set is moving
the spread shape up 2 frets landing at 14th fret 5th string 12th fret 4th
string. Then back 2 frets to
previous shape of 12th fret 5th string and 10th fret 4th string for the
final 123 count. Whew! I see why they invented tab now! Next Stay on the
“G” chord we started this section with and go back and forth between
this and the second shape, 12th fret 5th string 10th fret 4th string. The first shape gets
a count of 123, to the next shape for 123, back to the first shape for
123, then the second shape for the final 123 count. Now lets go back and
repeat the beginning of this section marked with * asterisk. But just those first four sets of 123’s. We can now end this
section by playing the same G chord, C shape for a 123 count, then
skipping forward to fret the 14th fret 5th string and 12th fret 4th string
for the next 123 count, then back to 12th fret 5th string 10th fret 4th
string for a 123 count and finally to the 10th fret 5th string and 9th
fret 4th string for the last of the 123 counts. Keep in mind for all
of these “G” based riffs; pinch your “G” sub-bass note. Next we’re going
to descend back down the fretboard while switching our sub-bass note back
to “D” Fret the, 9th fret
5th string and 7th fret 4th string. This should be the third spread shape
we started out with near the beginning of the tune. Play this shape for
four counts of 123. Now drop back two
frets to land on 7th fret 5th string and 5th fret 4th string. Give these four
counts of 123 also. Back to original D
chord, C shape played at 5th fret, 5th string and 4th fret, 4th string. Give this shape four
counts of 123 and stay there, playing another four beats of 123. We’ll
use this as sort of a
“connector” measure to the next set of changes. Only two more
“sections” to go! The next part just
goes back and forth from a “D” to “C” chord. Start on the 5th
fret 5th string, 4th fret 4th string for 4 counts of 123. This is the
“D” chord we’re used to by now. Now drop back two
frets with this shape. Add your left hand pinky to fret the 5th fret 6th
string.….essentially, we now have a “C” chord proper with a 5th in
the bass. And our sub-bass
note will change to a “C” note or 9th sub-bass string. Again, give
these shape four counts of 123. Go back to repeat
this set of changes. “D”
for four more counts then “C” for four more counts.
This section looks
like this: “D”
123,123,123,123 You end on the
“C” chord and will need to stay there for another set of four counts
of 123. This tune is good
for exploring the dynamics of your harp guitar; first, let’s isolate the
right hand fingers from the thumb. Now play lightly with you fingers while
gradually adding back the thumb (bass)! Use your dynamics by
increasing you volume with each count of 123……or by placing the accent
on different beats Now we come to what
may sound more Kottke-like than any of the previous sections. There’re will be a
couple of awkward shifts in this part (saving the best for last!) First thing we do is
fret a modal (no third) B chord by fretting the 5th string 2nd fret with L
H. index then fret the 4th fret 4th string with L.H. ring then place your
L.H.pinky below the ring on the 3rd string 4th fret. A power chord of
sorts! Give this only one
count of 123 while pinching your “B” sub-bass string on the first beat
along with the 3rd string. Slide forward one
fret, again one count of 123 this time with our “C” sub-bass note. Next we shift back
up with the left and right hand to the original 5th fret 5th string, 4th
fret 4th string “C” position “D” chord. Stay here for two
counts of 123,123. It looks like this: B 123, C 123, D 123,123… Repeat that whole
process of B, C, D, D four times, then you’re done!! On this last section
you will want to shift you right hand down for the B and C modal chord
shapes, then bring it back up for the last “D” chord. This will be
difficult in that your R.H. thumb will be going up while your R. H.
fingers will drop down a set of strings (you’re playing the notes
you’re fretting) I would suggest to
single out this section and practice it by itself until you are
comfortable enough to work it into the tune!
Enjoy the audio,
clams and all! And thanks for
taking time out to check out these workshops! - Stacy |
|
|
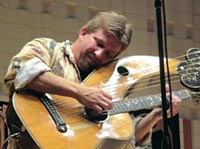
Stacy Hobbs has been performing, recording, and teaching music for the past 23 years. He purchased his first Harp Guitar in 1998, which proved to be his true calling. Visit www.stacyhobbs.net for more! | |
All Site Contents Copyright © Gregg Miner, 2004,2005,2006. All Rights Reserved.
Copyright and Fair Use of material and use of images: See Copyright and Fair Use policy.
|
If you enjoyed this article, or found it
useful for research, please consider making a donation to The
Harp Guitar Foundation,
|
|
|
|
All Site Contents Copyright © Gregg Miner,2004-2020. All Rights Reserved. Copyright and Fair Use of material and use of images: See Copyright and Fair Use policy. |